Wii Backup
tutorial
Figured this would be a good place to post this
tutorial I wrote. Credits go to this website.
This article is aimed at someone that has not followed the modding scene for
the Nintendo Wii and wants to be caught up in one quick de-briefing.
The contents of this file could become outdated
very quickly because the modding scene is exploding right now.
I will
do my best to keep it updated so if you see the date is really old shoot me an
email and I will update it or at least say that nothing really revolutionary
has happened in the modding scene.
Click
below to access the tutorial on backing up your Wii ad Gamecube discs.
Remember
that to play the backups you will need a modchip!
The modchip is rapidly changing and I will be
outlining this in my next article which is due sometime later this week.
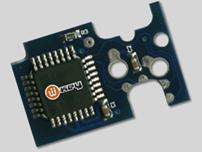
First step in copying your games for backup purposes is to get the right
software and hardware. You will need one of the following DVD drives to copy
games(no others will work). I received a pm that some people were having
trouble locating the drives. If you go to newegg you can't just search for the
model for some reason. You have to browse DVD-ROM drives then LG drives. Here
is a direct link to the one I have. http://www.newegg.com/product/produc...82E16827136088
* LG-8164b
* LG-8163b
* LG-8162b
* LG-8161b
Personally I have the 8164b and have had zero problems. I'm sure the others are
fine also. I ordered mine from http://www.Newegg.com.
Once you install this drive into your computer you will need to download a few
applications.
·
Raw Dump 2.0
* .Net Framework
2.0
* Software to unzip the Raw Dump files (Winrar)
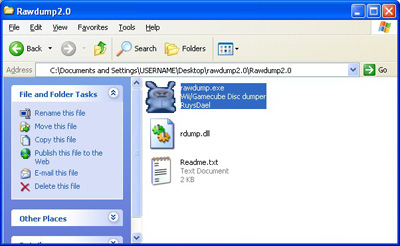
Once you download the files above then
right-click on the rawdump2.0.rar and select "Extract to rawdump2.0\"
this will make a folder on your desktop called rawdump2.0.

Now insert your Wii or Gamecube game into the LG drive that you have ordered
and installed. Then open the rawdump2.0 folder and double click on the
rawdump2.0.exe file.
After doing this you will be presented with the following interface. If your
wondering what all the buttons are next to me close and minimize buttons it is
a program called UltraMon for multiple monitor setups. Just ignore this. I am
also running the Zune Windows XP Theme.
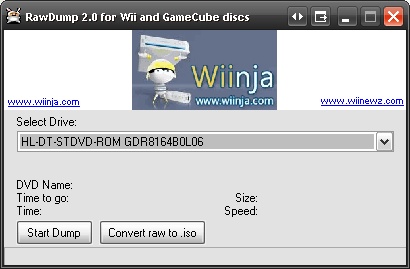
The next step is to just click "Start Dump." On my computer this
process took just about 2.5 hours.
When it is complete you will be greeted with a
nice finished message.
The file it creates will be in the same
directory as the rawdump.exe file. It should be called "Game
Name.iso."
This ISO
is an image of the actual game and is ready to be burned.
You can burn this image with many different
applications, but I will be providing screenshots for Nero Burning
This step is very important. You need to check your file and see how many KB
large it is.
To do
this Right-Click on your iso(this is in your rawdump directory) and select
properties. It should say,
Nintendo Wii ISO size: 4.37 GB (4,699,979,776 bytes).
Nintendo Gamecube ISO size: 1.35 GB (1,459,978,240 bytes)
All Nintendo Wii and Gamecube images will be this exact byte size.
If your Wii image is off by any then you have a
bad dump and need to try again.
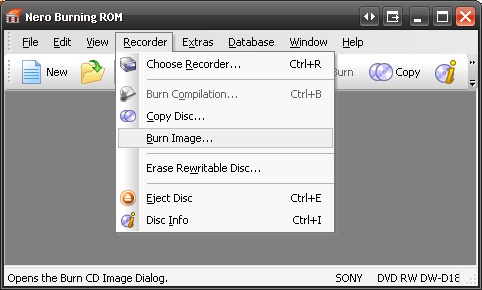
So next step is to open Nero.
The first step once nero opens it to just cancel out of the create new
dvd/cd/etc dialog.
Once you have exited from this dialog you go to
Recorder->Burn Image.
After making it this far you are almost done. When you click burn image you
will be asked to locate the image.
The image will be located in your Rawdump2.0
folder. For me, this is on the desktop.
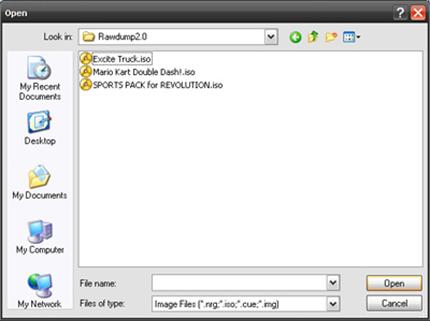
Select the game that you have dumped with rawdump and click open.
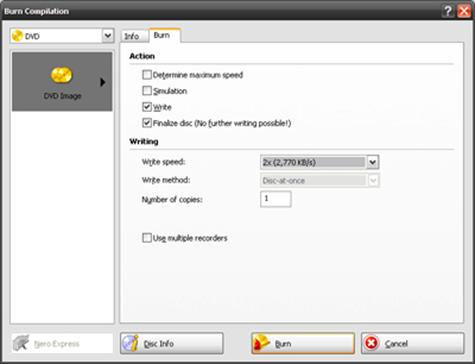
You will then be presented with the below
dialog.
Make sure to select a relatively slow burn
speed at first to attempt to prevent DRE's(Disc Read Errors).
These seem to be common among people that do
not use high quality dvd's.
For a thread dealing with media check here.
I hope this mini-guide helps you.